Over the many versions of TFS there were existing workarounds that allowed us to send an email to the developer that queued the build and it had failed. Although these workarounds did work, I always felt that this should have been handled by the alert system within TFS. What was lacking was some sort of condition that if the build failed it should go to the developer that queued it up.
More recently I was tasked to find or build another workaround that would work within the vNext version of the Build engine. Well I started down this quest collecting api’s that I could call when I thought I would have one more look at the TFS alerts, maybe there were some updates to that part of the tool.
New Notification Engine
What do you know, there were alot of changes made with this engine but not for TFS 2015, these updates show up in TFS 2017 Update 1. One more reason to update to TFS 2017 for all those still using an on premise version of TFS as this has been in VSTS for a while now. In the remainer of this post I will walk you through the steps to implement this big improvement in the notifications and how to solve that problem of just sending an email to the developer that caused the build to fail.
If you are on VSTS or TFS 2017 Update 1, the steps are exactly the same which is nice as in my line of work I always hate having to remember two different ways for doing the same thing.
New Name


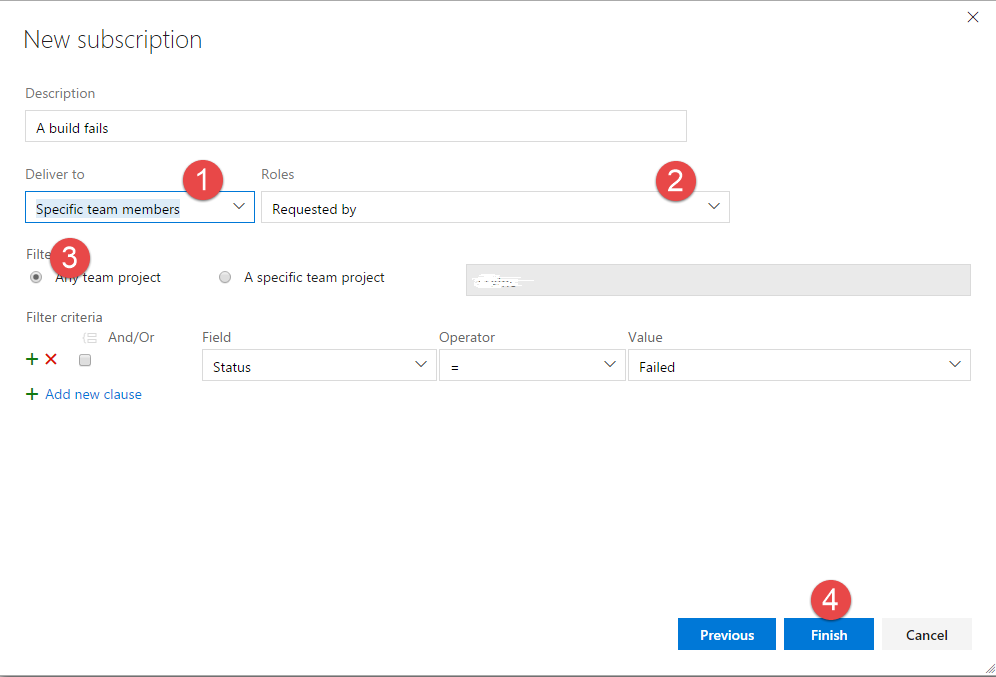
This opens up a very different looking screen but the conditions to make this work are all there. First off we select “Specific team members” for the Deliver to choice, and in the Roles choice select the “Requested by”. This is the portion of the Notification that only selects the team member that queued up the build, in other words requested the build.
Although we had to select a project before we could get to this Notification area, in the next section the Filter, we can select “Any team project” which would apply this notification to all the TFS Projects. The filter criteria should be correct and not require any changes as this is basically gets fired off when the build has Failed. You just click on the “Finish” button and the notification is ready for testing.
What did the Notification area above the Project do?
Well just before I let you go setting up your Notifications using the proper tool, I thought I would let you know what would have happened if we did not select a Project first before we went to the Notification screen. If you do this you will notice that on the screen some of the criteria information that we used to narrow down the notification down to the developer that requested the build would not be there. These Notifications are the subscription only ones that have been in TFS since the beginning of that product. This does feel a bit strange to me, almost like these two concepts should be the opposite of what they currently are. It is what it is but at long last we can now use the Notification engine to better suite our needs.