Typically if it does not matter if team member’s can view the work of other teams or maybe they even work across teams which is usually the case, then having Contributor access at the TFS Project is all that is needed and desired. However, there may be those situations where you find that you need to guard data from each team so that the other teams cannot see the source or the work items of the other team and yet be within the same TFS Project so that we can get good cross team reporting that makes sense.
This post will take you through the steps that you will need to take in order to put that level of security in place.
Creating Teams
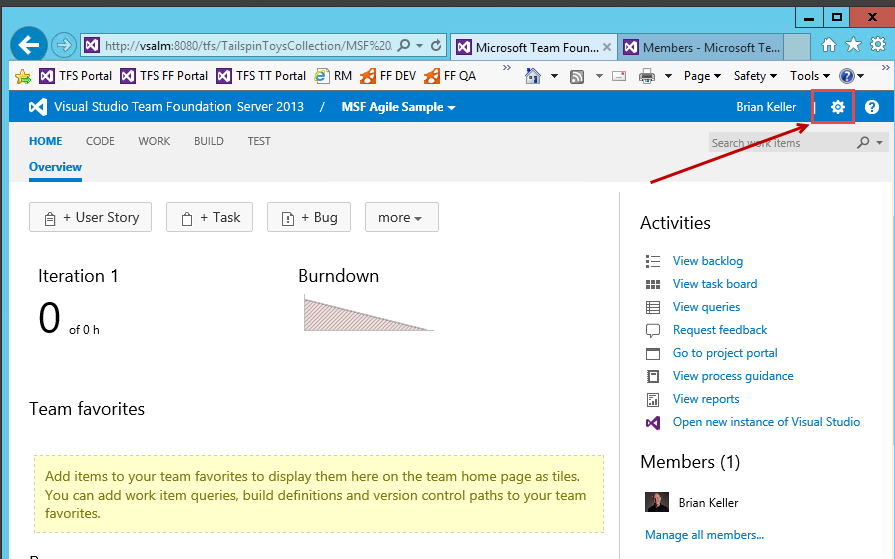
You create the teams and administrate the security from the TFS admin page. You would need to be a Project Administrator in order to create teams and you would have to be a Collection Administrator to create TFS Projects. Assuming that you have the appropriate permission we start from the normal TFS web access page and click on the gear icon on the very far right of the page.
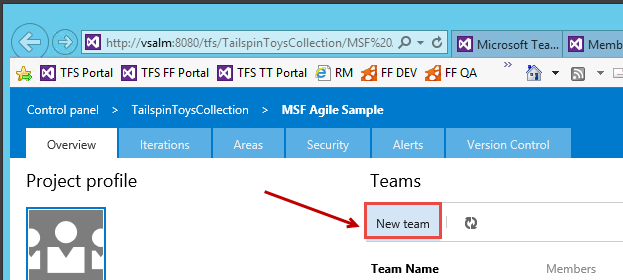
Then just click on the New team button to create a new Team.
When creating a team it is important not to put them into any of the built in TFS Security groups that exist. These groups are setup from the TFS Project level and their rights and permissions filter all the way down to include all the teams. The end result is that you add a member into one team and they would still see the work and source from all the other teams because they got their permissions from the TFS Project level.
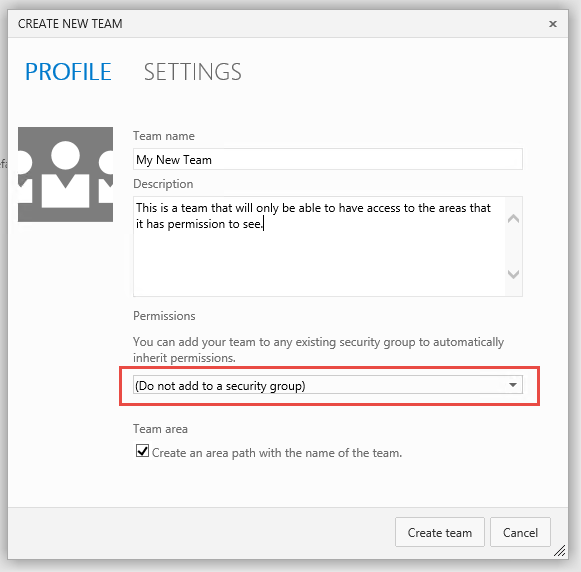
When you create the team make sure that you set the permissions to (Do not add to a security group) and although it is not saying this what happens is that this team also gets its own TFS Security Group with that name. This means that anyone we add to this team (provided they did not get higher permissions by being a member of some others team that does have a higher elevated security group) they would only have access to the things that we have given permission to for this team.
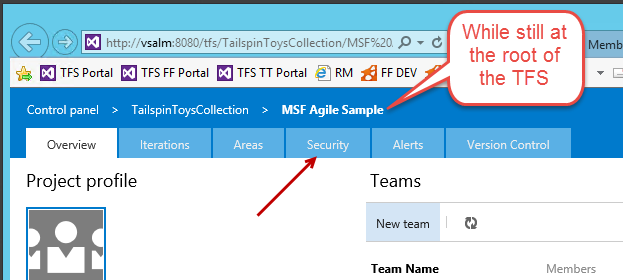
Before we move on to set the actual security we will have to set up the security for this team from the perspective of the TFS Project. There are a few things that we would have to set here otherwise the team members would not be able to even see their team. You do this by starting from the root team (this would match the name of the TFS Project) in the admin page. While still in the page where you created the team click on the Security tab.
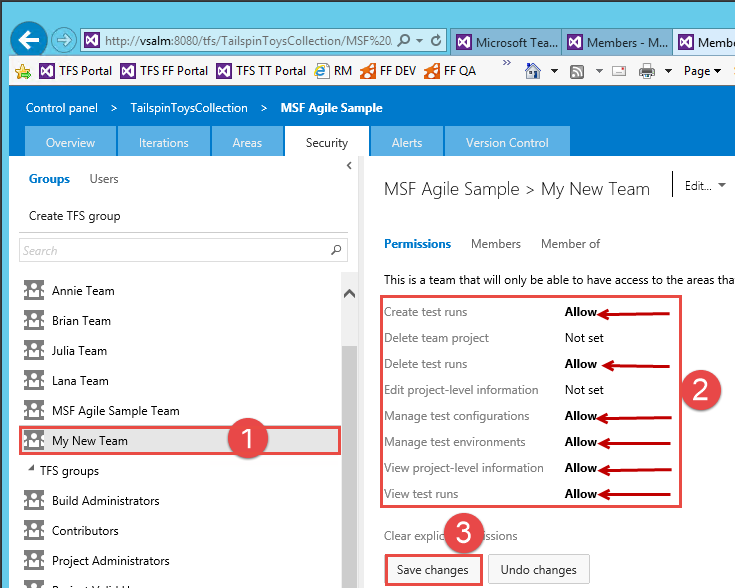
Here you want to select your new team and then allow the permissions at the TFS Project level. You might be tempted to not set the View project-level information but doing that would not allow them to even see the project let alone get to their team. Things you defiantly don’t want to allow is the ability to Delete team project or edit that project-level information that sort of thing should be reserved for someone like the Project Administorators.
Area Path
The next thing that we need to tackle is the area path. In TFS starting from TFS 2012, the area path is what represents the team. Work items in the area path of the team is what we are able to use to keep the work items only visible to the appropriate team.
When this security screen first pops up you can see all the security groups that are from the Project level and it is important to note that if you want to restrict any users you want to make sure that they do not fall into any of these groups otherwise it will leave you wondering why they are able to access things that you did not give them permission.
The first thing you will want to do is to add the team security group to the area.
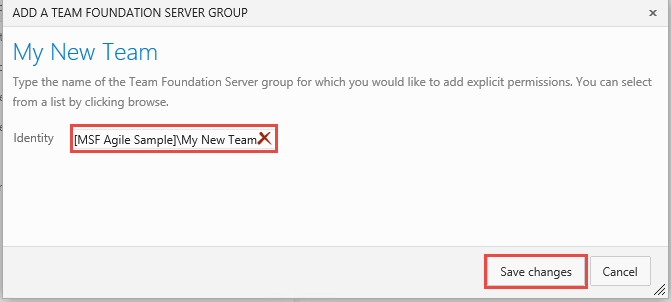
Find your team security group (it will existing from the creation of the team) and click the Save changes button.
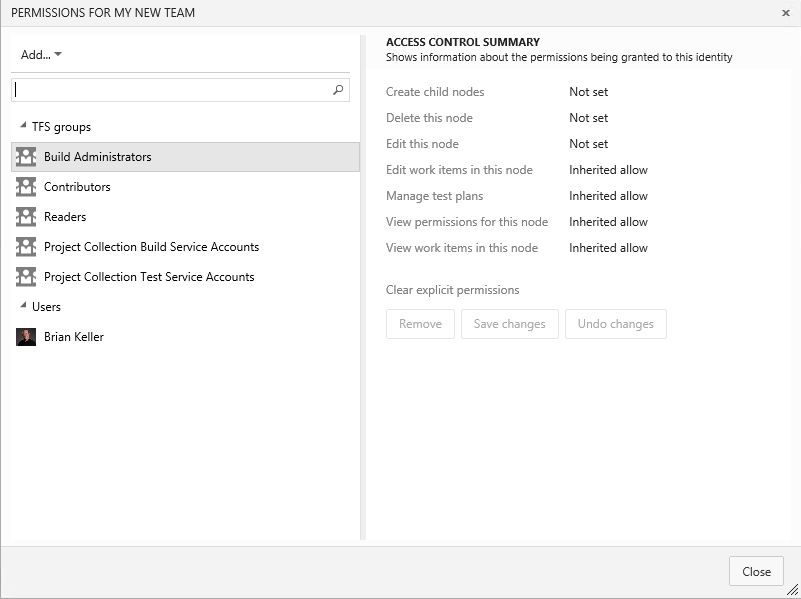
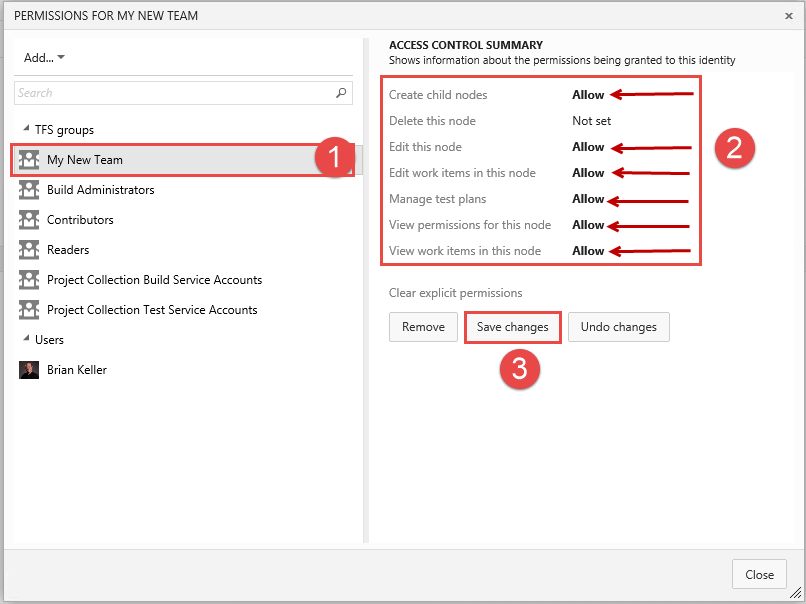
With the new TFS group selected you will see on the right that nothing is set by default. Click on all the permissions that you want to grant to the users of this group and then click on the Save changes.
Version Control Security
Version control security works in a similar way that we had going with the areas. To start, the security is placed at a folder and then the permissions would be set on each of the folders for the team that has permission to access that folder and down (recursive).
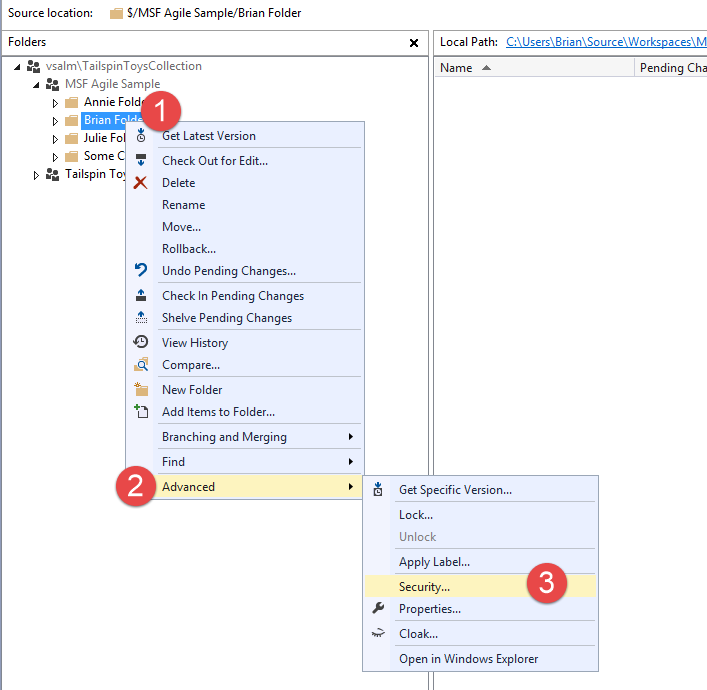
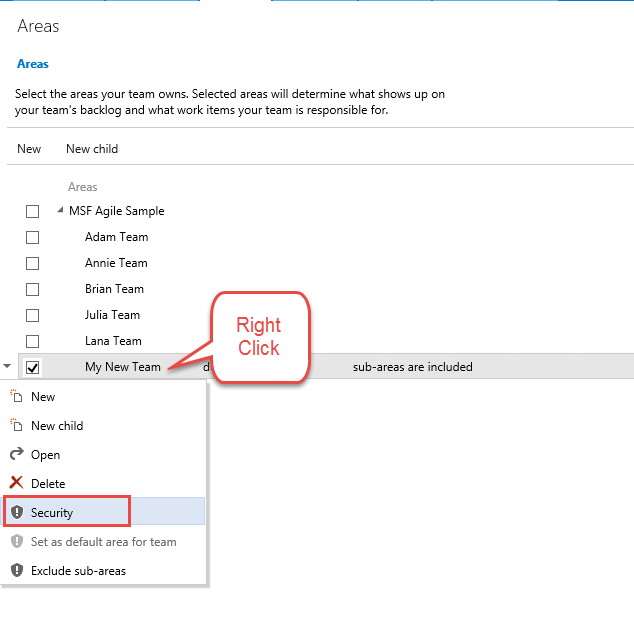
The first step is to right click on the folder where you want to apply the security then go down to Advanced from the context menu that pops up and finally click on the Security tab.
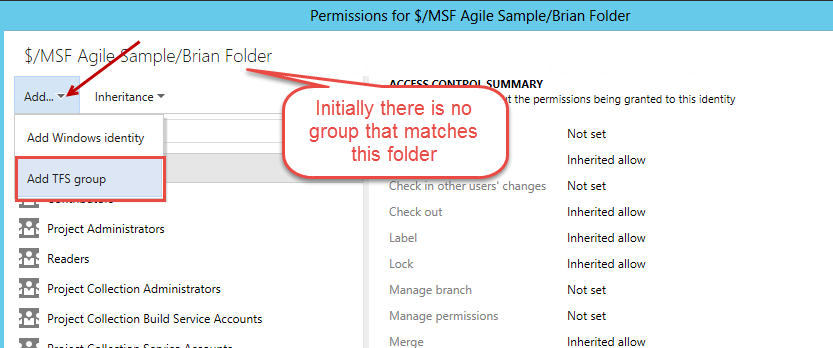
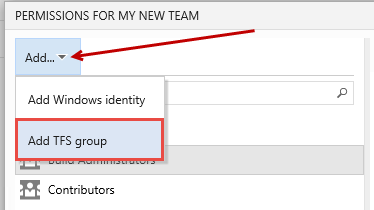
When this folder opens up for the first time the group for the team will not be in the list of roles that have permissions. First thing you will need to do on this screen is to click on the Add button and choose the menu option of “Add TFS group”.
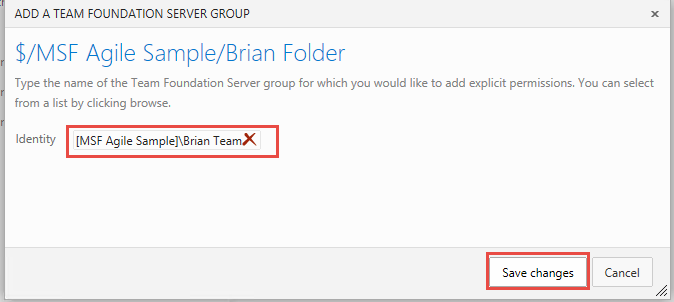
Next you will need to select the team group and add the permissions that you want this new group to have and finally click on the Save changes.
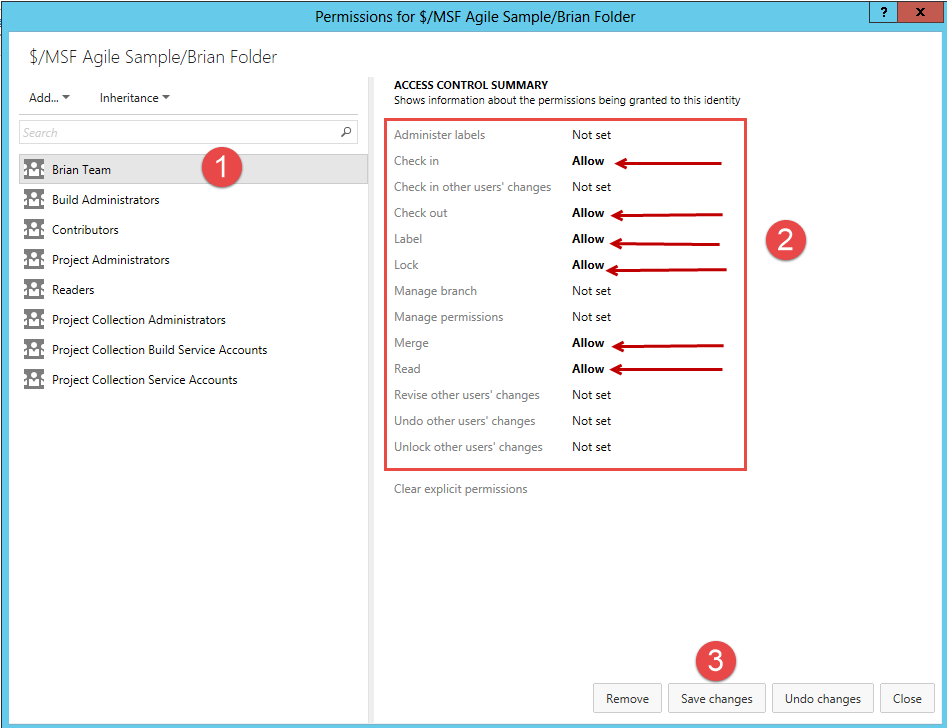
That is really all it takes to setup security at the team level. The thing to keep in mind is that the members should not be members of any of the default roles, as you can see from the image above all these roles have some sort of permission to at a minimum read (Readers role). If you follow this pattern where the members are only members of their team, then they would only see source that their team group can see. It would be like the other source would not even be there.
Shared Folders Security
For each of the teams to be able to show query tiles on their home page, those queries must exist in the Share Queries area. Because each team will have different needs and reporting on items that are different from other teams they should have their own folder area that only their team can see. One of the ways we can manage this is to create a query folder for each of the teams under the Share Query folder and then add security specific to each team.
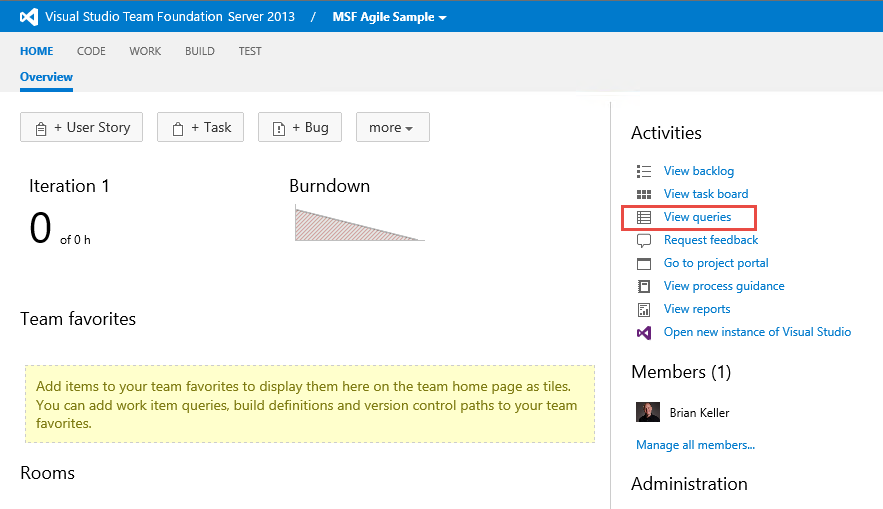
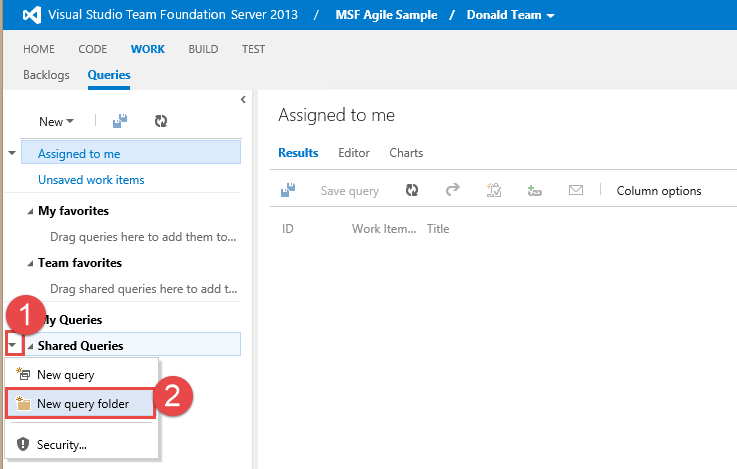
Start in the Shared Queries folder, you can do this in either Web Access or with Visual Studio. Web Access is shown here as everyone will have access to this tool but the steps are very similar to this to do this in Visual Studio. Here we start from the home page and click on the View queries link
Expand the Shared Queries folder to expose all the folders and out of the box queries. Then right click onto the Shared Queries folder and select “New query folder”.
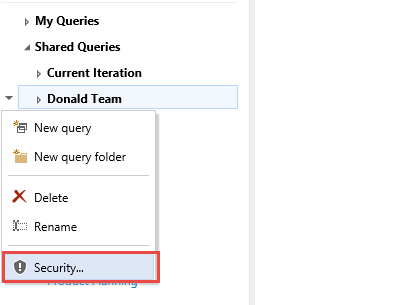
Enter the name of the team for this query folder. After it has been created right click while on the Team Folder and select Security…
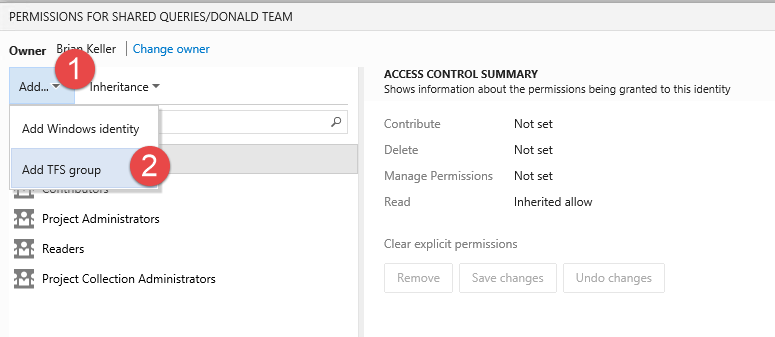
Click on the Add dropdown control and the “Add TFS group” selection. This will open another dialog box so that we can add the Donald Team group to this folder.
Find or enter the name of the Team and then click on the Save changes button.
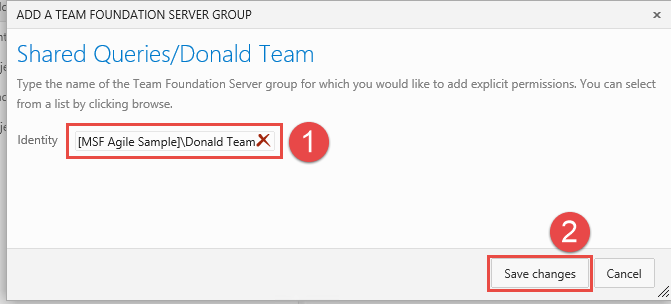
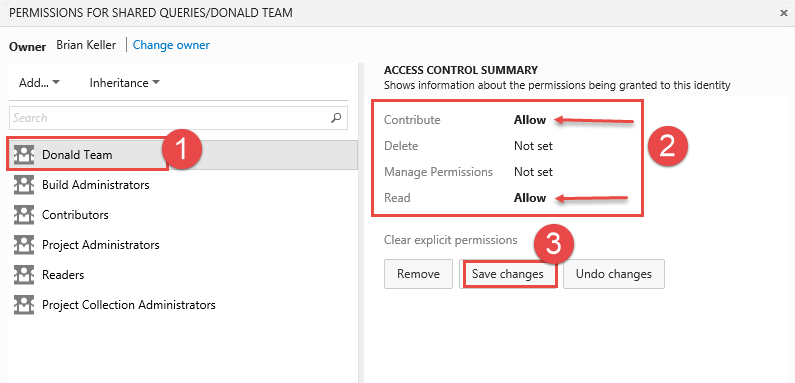
With the team security group selected you can select the permissions that they are allowed to have. Typically this would be the Contribute and the Read permissions. Then click on the Save changes button.
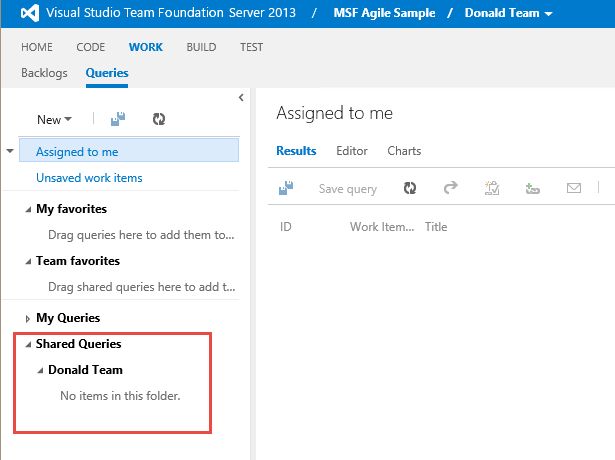
Now going back to that Shared Query view, you want to look at what this looks like from the view that a member who is only a member of this team would see. They can only see their team folder under Shared Queries, even the defaults are not visable.
Active Directory Groups
One final discussion in this area of Security and that is showing how the Active Directory Groups play into this whole thing. The TFS Groups are used to manage the permissions but instead of adding any individuals to the Group you add the AD Group instead.
It pretty much has to be done this way because TFS automatically makes a TFS Group at the time that the new team is created. Another way that this could have been done was by using a TFS Group and give it the permissions directly but the way that TFS works, this is the cleaner way to go because the TFS Group is going to be created regardless.
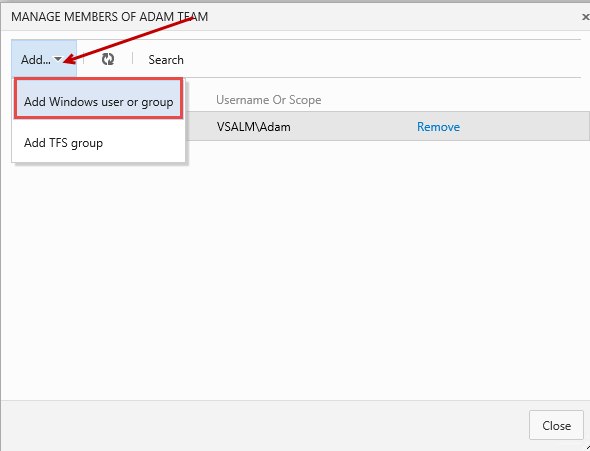
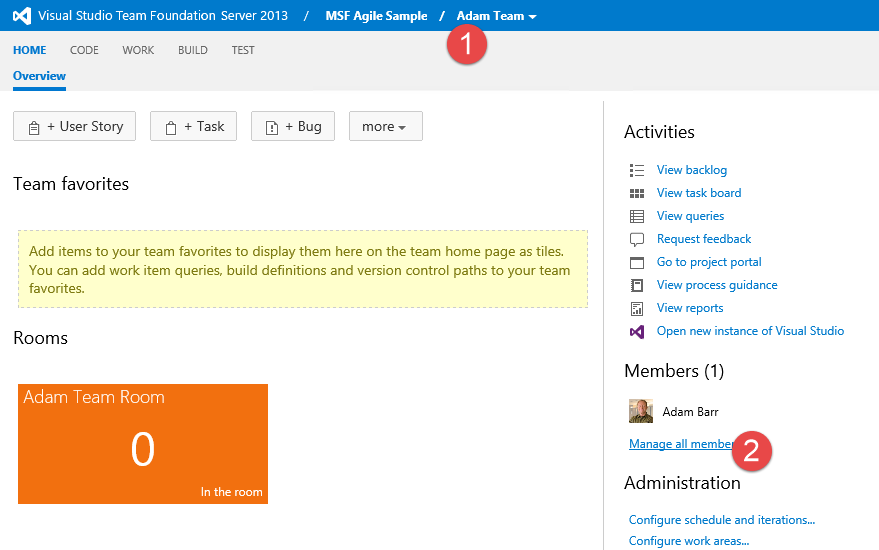
Start from the home page of the Team and make sure that you are in the team that you want to add the active directory groups. Next click on the Manage all members link which will open up a new window.
In this window click on the Add… dropdown and choose “Add Windows user or group”. This is where you would add the Active Directory (AD) group to be used to manage the actual users. From this point on as you add or remove people from the AD Groups they would get or loose the rights that were assigned to the appropriate team.